
Do you want to add a touch of whimsy and elegance to your home decor, gift packages, or party decorations? Look no further! In this tutorial, I'll show you how to make paper butterfly decorations that are not only beautiful but also incredibly realistic. These paper butterflies are inspired by actual butterfly species, so you can enjoy the beauty of nature without the fleetingness of their flight. Get ready to embark on a crafty adventure and turn ordinary paper into stunning works of art!
Capturing the Essence of Real Butterflies
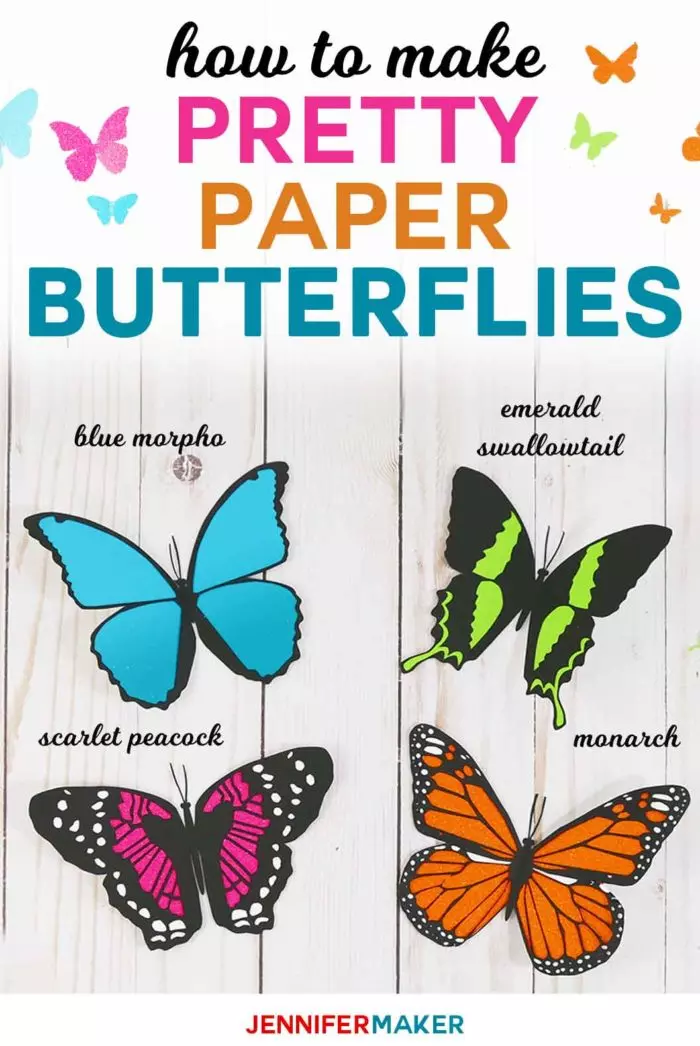
During a recent vacation, I had the opportunity to visit a butterfly house and was captivated by the breathtaking beauty of these delicate creatures. However, their ephemeral presence left me longing for more. That's when I decided to create paper butterflies based on real species, not just fanciful representations. By using high-resolution photos of four different butterflies - the blue morpho, emerald swallowtail, scarlet peacock, and monarch butterfly - I meticulously traced their wing shapes and intricate details to craft these realistic paper decorations.
It's important to note that the level of realism in your paper butterflies will depend on the type of paper you use and how you choose to decorate the wings. Whether you opt for fun and whimsical designs or prefer to mimic nature's palette, the choice is entirely up to you. Let your creativity soar as you bring these enchanting creatures to life!
 These realistic paper butterflies are a stunning addition to any project or home decor.
Materials You'll Need
To start your paper butterfly adventure, gather the following materials:
- Cardstock
- Free SVG, DXF, or PDF files (Design #99) found in my resource library
- Cutting machine (such as a Cricut) or scissors if cutting by hand
- Markers, paints, alcohol inks, or watercolors (optional)
- Spray adhesive
- Glue
Creating Your Paper Butterfly Decorations
Follow these simple steps to bring your paper butterflies to life:
-
Cut out your cardstock using the provided SVG, DXF, or PDF files. If you're using a cutting machine, ensure that your blade is sharp to capture the intricate details. If cutting by hand, print the PDF version or use the shapes as templates.
-
(Optional) Let your imagination run wild! Add a personal touch to the inside wings of your butterflies using markers, paints, alcohol inks, or watercolors. This is your chance to showcase your creativity.
-
Once your artistic endeavors have dried, it's time to assemble your creations. Turn the butterfly over and spray the entire back with spray adhesive. Carefully press the inside wing onto the back of the butterfly, securing it in place.
-
Gently bend the wings upward on either side of the butterfly body, giving them a lifelike and dynamic appearance.
And that's it! You now have a stunning collection of paper butterflies ready to be used as accents, embellishments, or standalone decor. Attach them to paper birdhouses, adorn a wreath, create an enchanting wall display, or let your imagination guide you. The possibilities are endless!
 Bring magic to any project with these charming paper butterfly decorations.
Final Notes and Cut Files
If you're eager to embark on this creative journey, you can access all the necessary cut files, including the free SVG, DXF, or PDF files, in my resource library. To gain access, simply fill out the form and retrieve the password. Remember to share your own paper butterfly creations in our Facebook group or tag us on social media using #jennifermaker. We can't wait to see what you come up with!
Love, JenniferMaker.com
Want to remember this tutorial? Save it to your favorite Pinterest board!


