Timelines are a powerful visual tool that can greatly enhance your documents, making information easier to understand and more engaging. While Microsoft Word may not be a graphic design tool, it does offer a couple of ways to create simple timelines. In this article, we will guide you through the process of creating a timeline in Word, explore different methods, and provide timeline templates that will help you save time and create impactful visuals.
Creating a Timeline in Microsoft Word
There are two methods you can use to create a timeline in Microsoft Word: manual and using SmartArt graphics. Let's break down these steps and explore the finished product for each method.
Manual timeline in Microsoft Word
Creating a timeline manually in Microsoft Word allows for more customization and flexibility. However, this method is a bit time-consuming. Here are the steps:
Step 1: Add a title
Start by typing and styling your headline. You can use one of the preset design themes in Word or create your own.
Step 2: Draw the timeline
Go to the "Insert" tab and select one of the line shapes to draw the center timeline.
Step 3: Populate the entries
Add rectangle shapes above and below the timeline to represent your timeline entries. To do this, go to "Insert" and select rectangle shapes. You can alternate the positions to accommodate more content. Make sure to adjust the shape formats to match your design.
Step 4: Add content
Insert text boxes and add the content for each entry. Bold the dates and important details. Customize the text box format as needed.
Step 5: Add icons and circles
Insert circles and icons to represent each entry. Use the "Insert" menu to add and size circles. Then, find suitable icons for each entry. Adjust the alignment and color of the icons.
Step 6: Connect the entries
Insert lines and circles to connect the timeline entries to the center. Align everything to achieve the ideal layout.
The finished product may require some manual adjustments, but it will closely resemble your desired design.
SmartArt timeline in Microsoft Word
Word offers pre-designed SmartArt graphics, including timelines. This method is quicker but may limit customization. Here are the steps:
Step 1: Insert the title
Start by typing and styling your title as you wish.
Step 2: Insert SmartArt timeline
Go to the "Insert" tab and select "SmartArt". Choose from the available timeline options. While the options are limited, you can explore other SmartArt graphics that could work as well.
Step 3: Add text
Use the text pane in the SmartArt tab to write all your bullet points. While you can do some tweaking, adjusting the size of the boxes can be challenging.
Step 4: Make adjustments
Bold some of the text as needed. To make room for icons, you can select the preloaded circles and change their format to be invisible.
Step 5: Insert icons
Use the "Insert" menu to find suitable icons for each entry. Adjust their alignment and color.
The final result may not be as customizable and may require some adjustments.
Timeline Templates for Microsoft Word
Before creating a timeline in Microsoft Word, determine where it will be placed within your document. Consider if it will fit within a horizontal layout alongside other content or if it can take up an entire page in a vertical orientation. Here are some timeline templates to inspire your design:
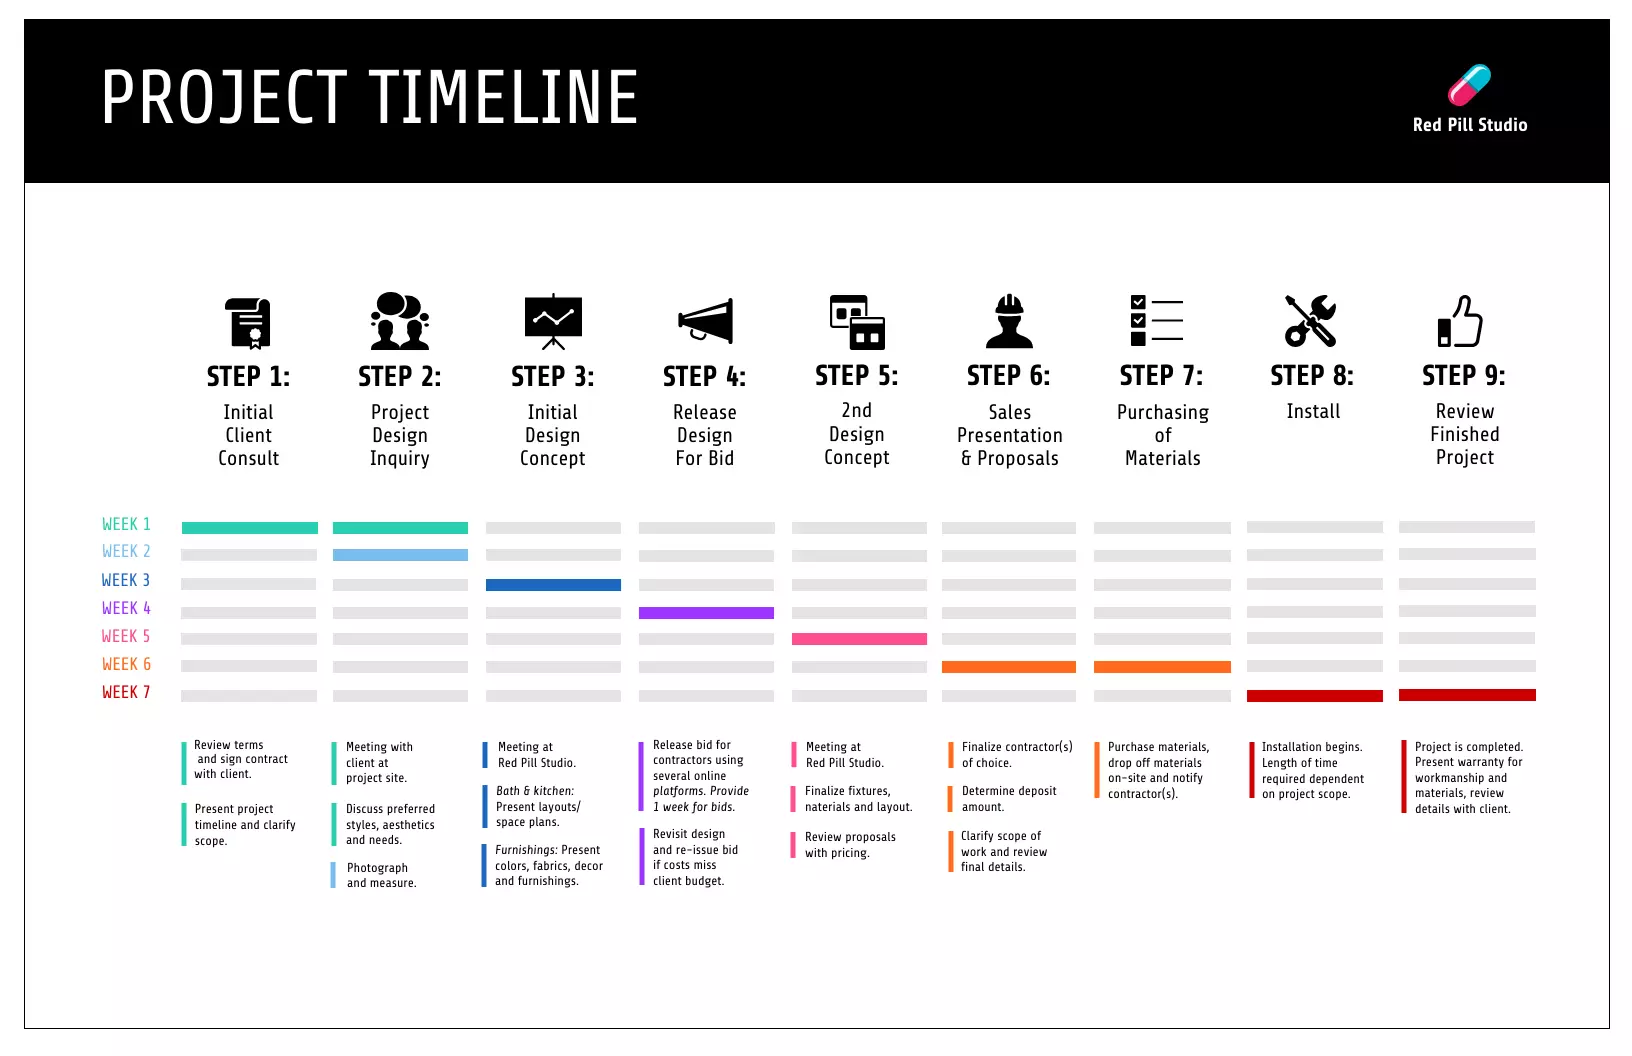
Project timeline templates for Word
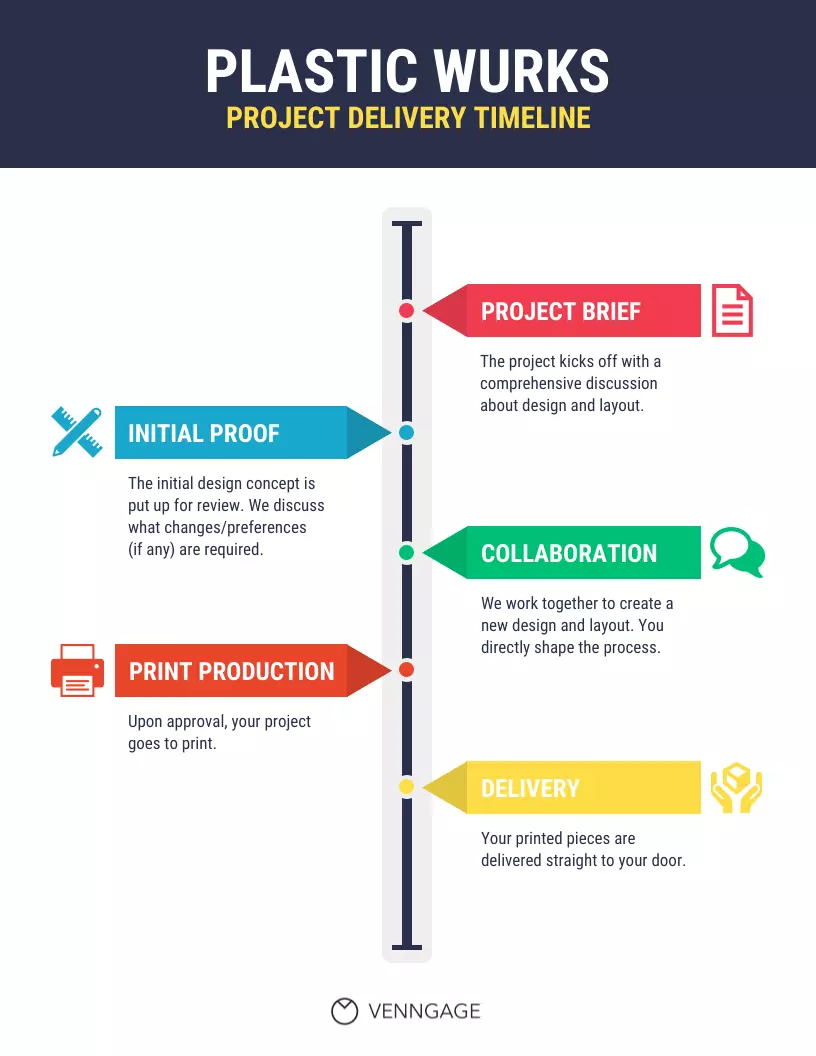
Project timelines help keep projects on track and organized. They can be used during the planning phase and throughout the project. Here is an example:
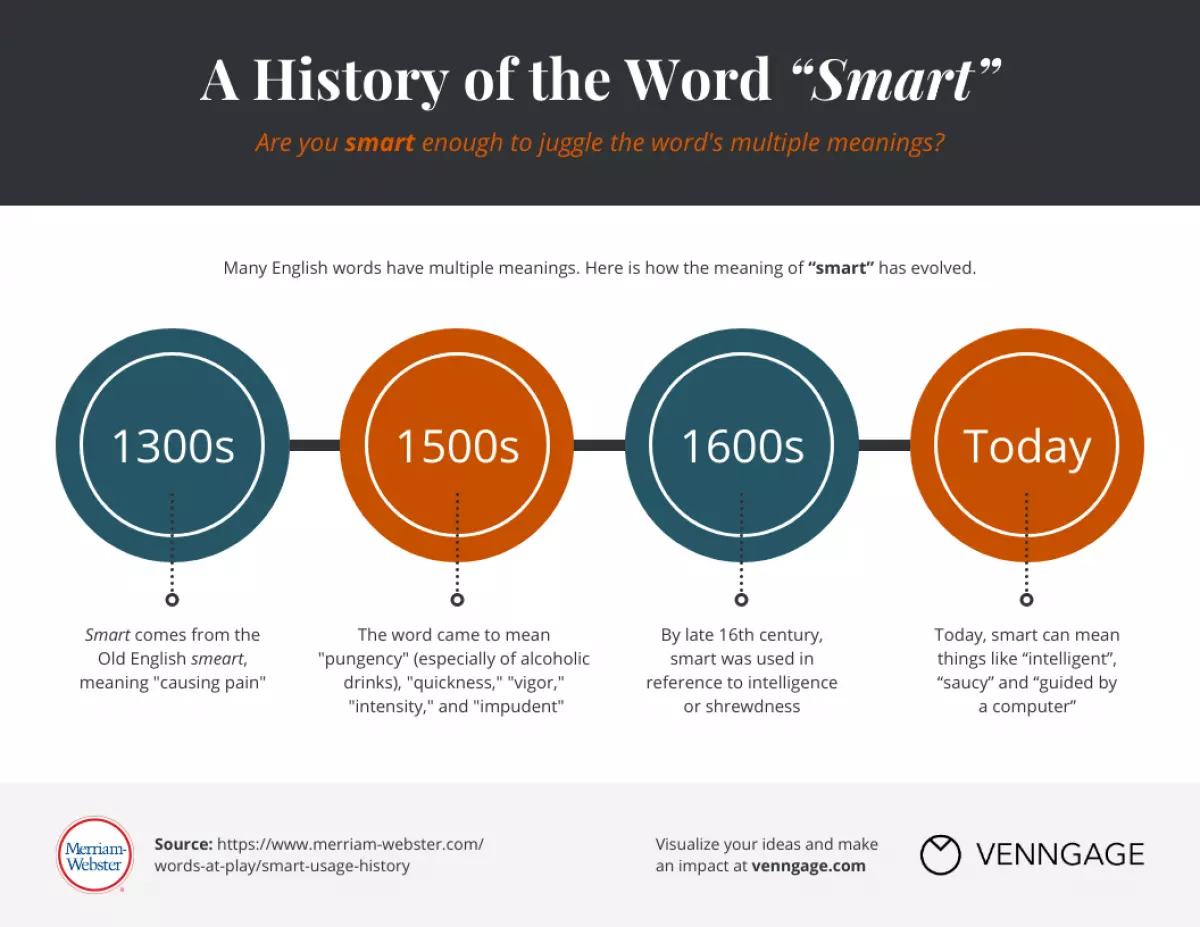
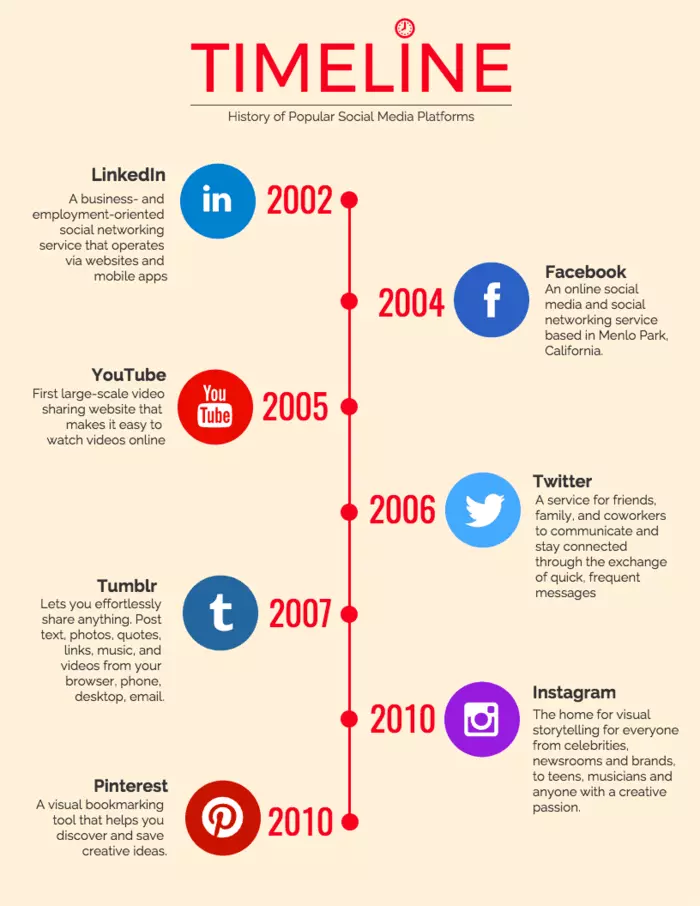
History timeline templates for Word
History timelines are great for content marketing or educational purposes. They provide a chronological overview of events. Here is an example:
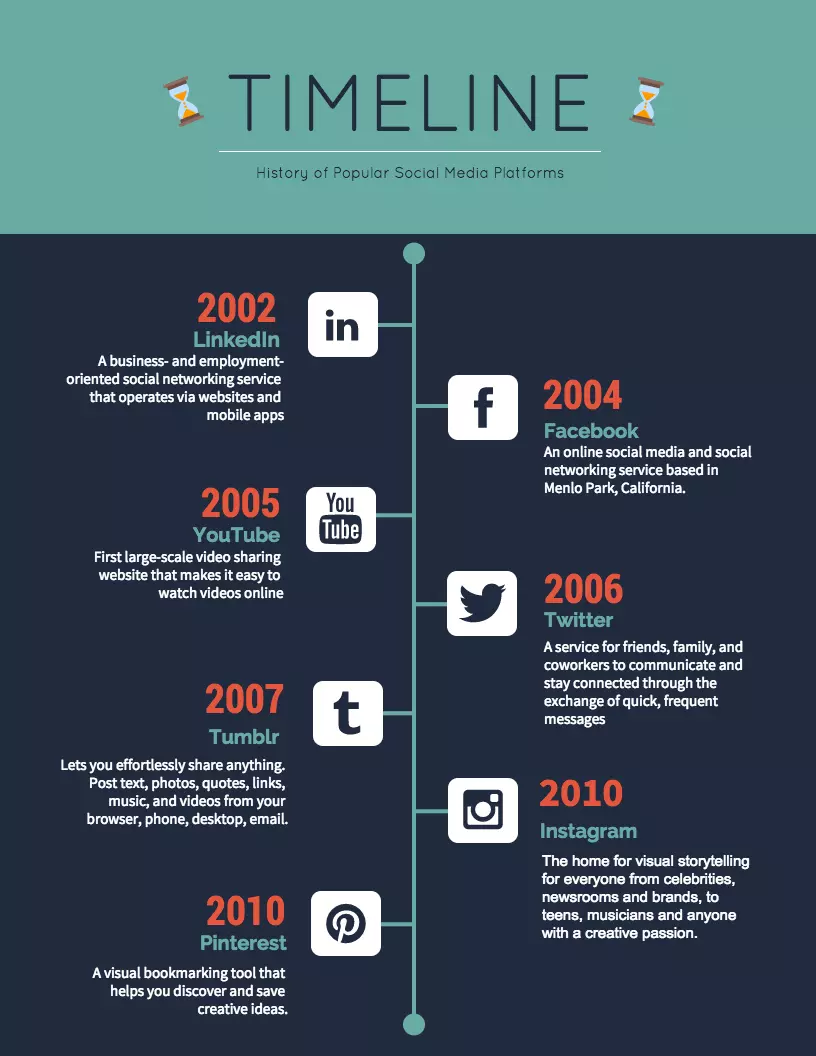
Vertical timeline templates for Word
Vertical timelines utilize the vertical orientation of Word documents, providing a visually appealing layout. Here is an example:
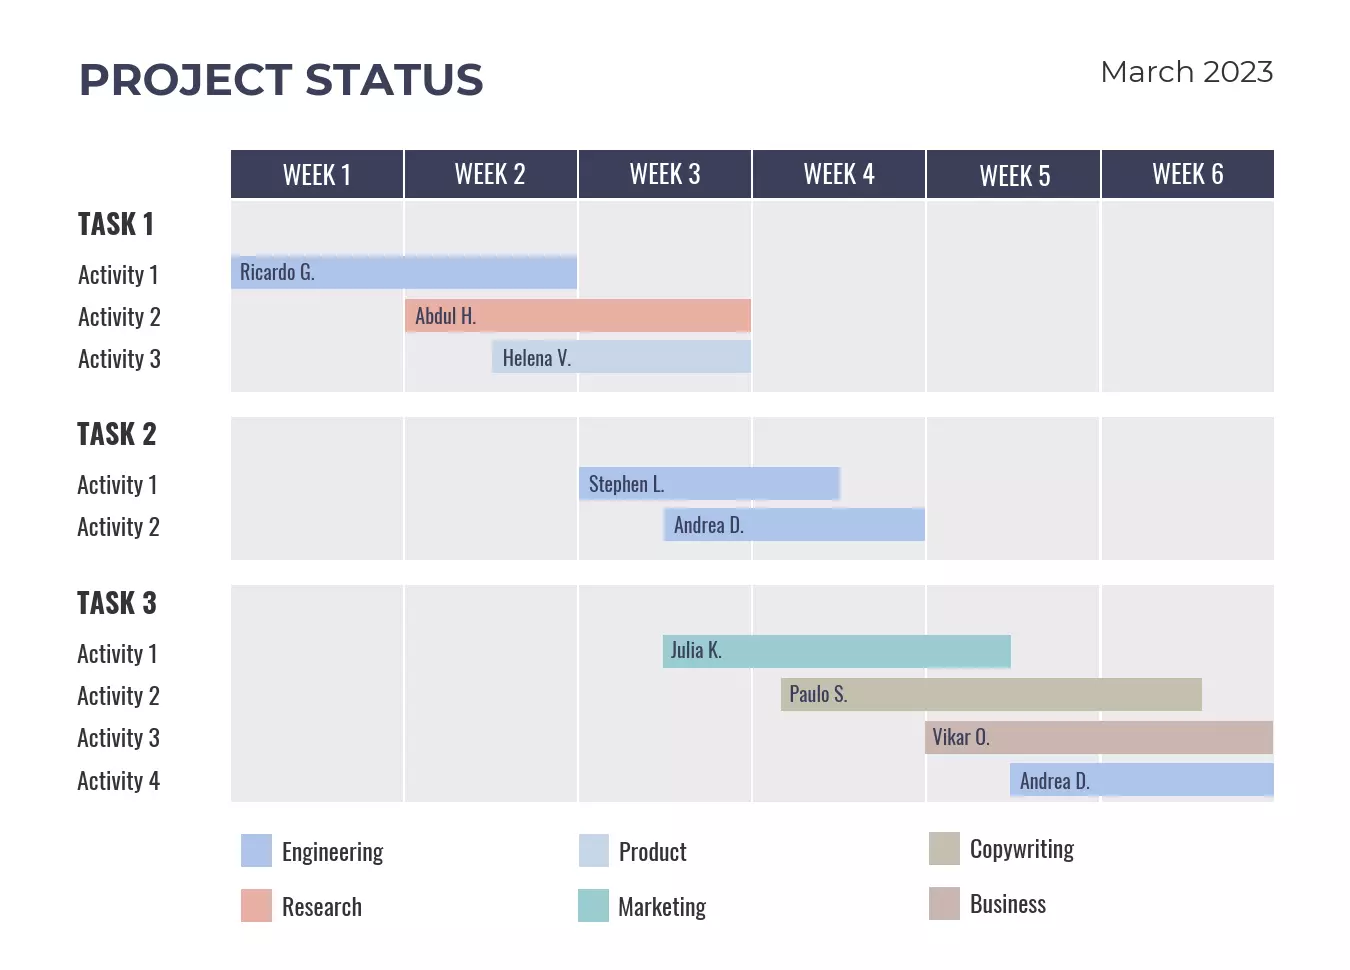
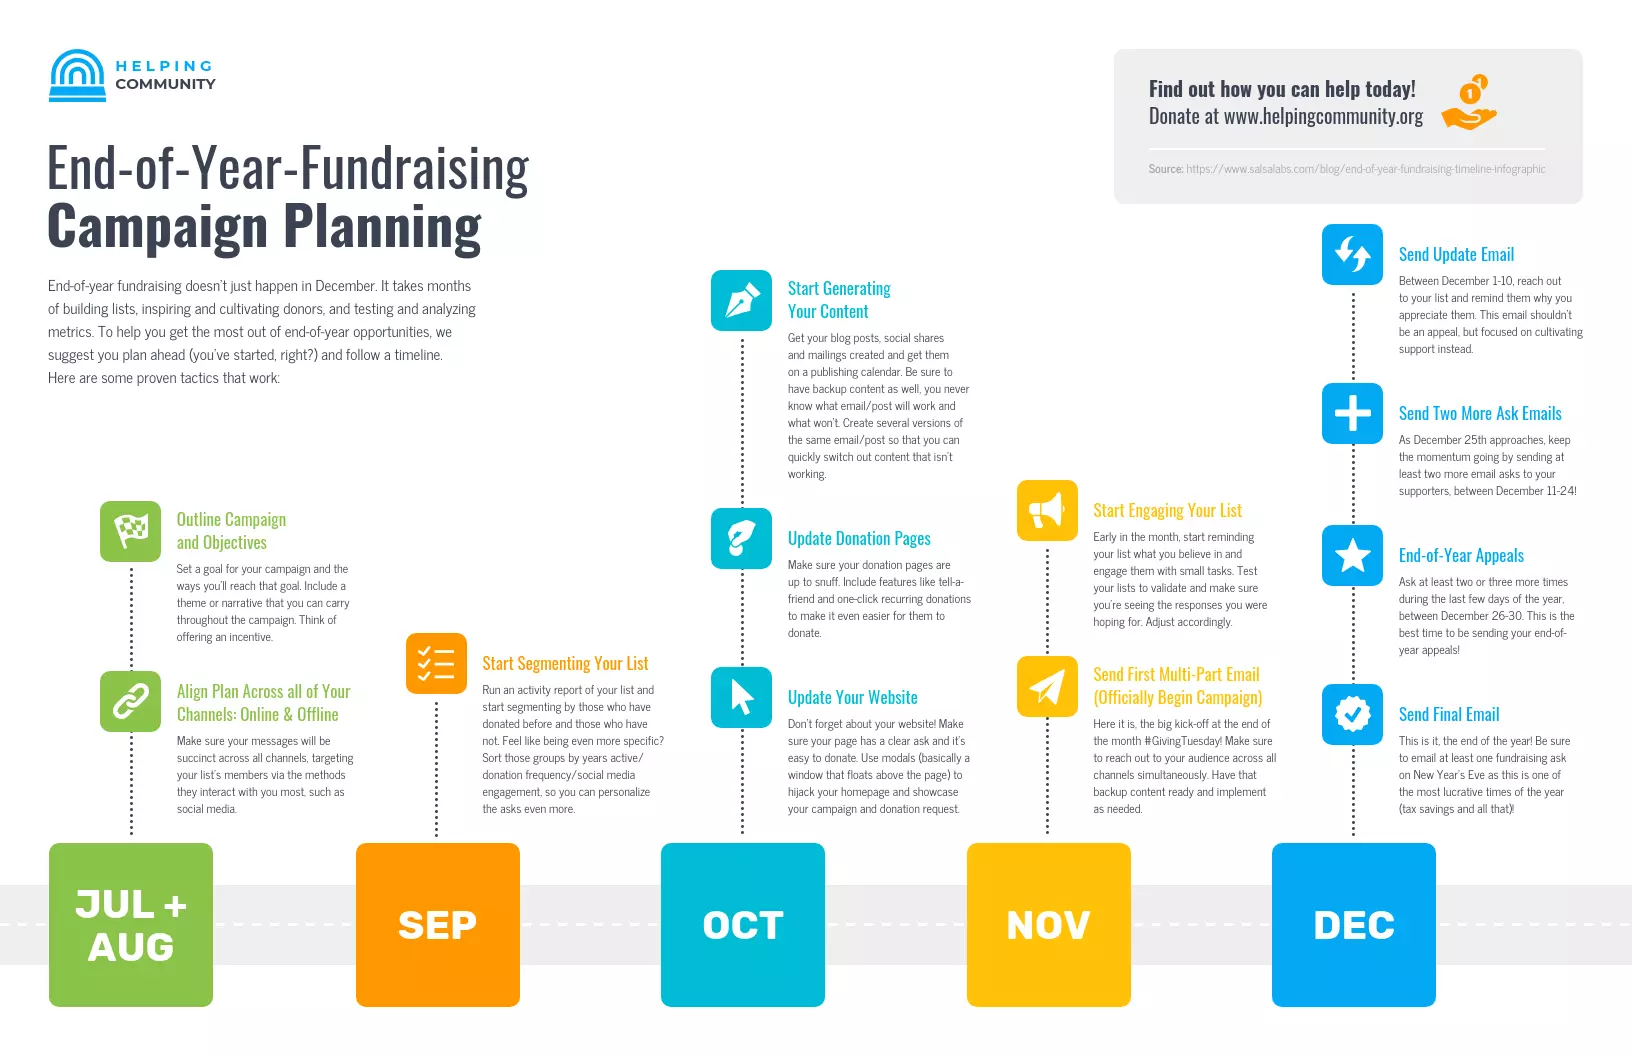
Project management timeline templates for Word
Project managers often use timelines to keep projects organized and on track. These templates work well for proposals or contracts. Here is an example:
Project plan timeline templates for Word
Project plan timelines are useful in the early stages of a project to outline tasks and milestones. They can be modified as the project progresses. Here is an example:
Project schedule templates for Word
Project schedule timelines provide a detailed flow of tasks and deadlines. They are useful for tracking progress and ensuring timely completion. Here is an example:
Project milestone templates for Word
Project milestone timelines highlight key milestones and events throughout the project. They help keep the team informed and ensure progress. Here is an example:
Event timeline templates for Word
Event timelines are crucial for planning and organizing events. They provide a detailed schedule and help ensure a smooth event flow. Here is an example:
Chronology templates for Word
Chronology timelines can be used for historical events or project details. They provide a step-by-step overview. Here is an example:

How to Make a Microsoft Word Timeline in Venngage
Creating a timeline in Venngage is simple and intuitive. With our new smart templates and smart list features, it's even more streamlined. Here are the steps:
-
Sign up for a free Venngage account using your email, Gmail, or Facebook.
-
Select a timeline template from our extensive library.
-
Start editing your timeline using our smart timeline editor, which allows for easy drag-and-drop design.
-
Customize your timeline with icons, illustrations, and branding elements. You can choose from over 40,000 icons and illustrations.
-
Share a public link for free or upgrade your account to download the timeline as a PNG file. You can also export it as a PDF, Interactive PDF, or PowerPoint for presentations.
In Summary
With Venngage's Timeline Maker, you can create custom, engaging timelines for your Word documents. Whether you choose to create a timeline manually or use SmartArt graphics, templates, or our smart editor, you can save time and create visually appealing timelines. Sign up for free on Venngage to start creating impactful timelines for your Word documents.